White and Oak Kitchen Remodel with Butler’s Pantry and Checkerboard Floors
At Ashmore Builders, we take pride in customizing each project to our clients’ tastes and lifestyles through custom cabinetry and millwork. Our design-build process ensures that each remodel gets a custom design, accurate budget, and quality craftsmanship that our clients will love for years to come. Each renovation brings its own unique challenges, but is also an opportunity to bring our clients’ dreams to fruition in a way that improves their lives. We love seeing how our clients put their own spin on each project, and this timeless kitchen design is a prime example of classic-meets-contemporary with its white and oak cabinet combination and checkerboard flooring. In this post we’ll cover our design process, and how we implemented a timeless look in this kitchen remodel. Plus, three steps to creating a balanced look in your own home. As always, selections are linked at the bottom of the post.

Video by Bonfire Visuals

Creating An Open Design Concept
Our clients came to us with a small, boxed-in, L-shaped kitchen that lacked counter space as well as personality. Its mismatched appliances and dark countertops left the space feeling dark and disjointed. Although the kitchen is small, it did have a hall pantry connecting the kitchen to the living area that offered valuable storage space. Our team came up with a design that capitalized on the available pantry space, and optimized the kitchen’s limited floor space.
Framing
First, our team knocked down the wall between the kitchen and living room. This required additional structural support in the attic to compensate for the removal of the load-bearing wall. Removing the wall to the kitchen not only opened up this ranch’s floorplan, but also allowed room for our team to install a six-foot oak island with storage and seating.
With the wall removed, there was no place for the refrigerator. Our team closed the doorway to the left of the oven, and placed the refrigerator in its spot. Now the sink, dishwasher, stove, and fridge are all within arm’s reach.
Next, our team created another doorway to the hall to the left of where the original had been. This new doorway, as well as the pantry entry, received an arched accent. This subtle curve detail creates visual interest and draws the eye upwards.
Oak Island Installation
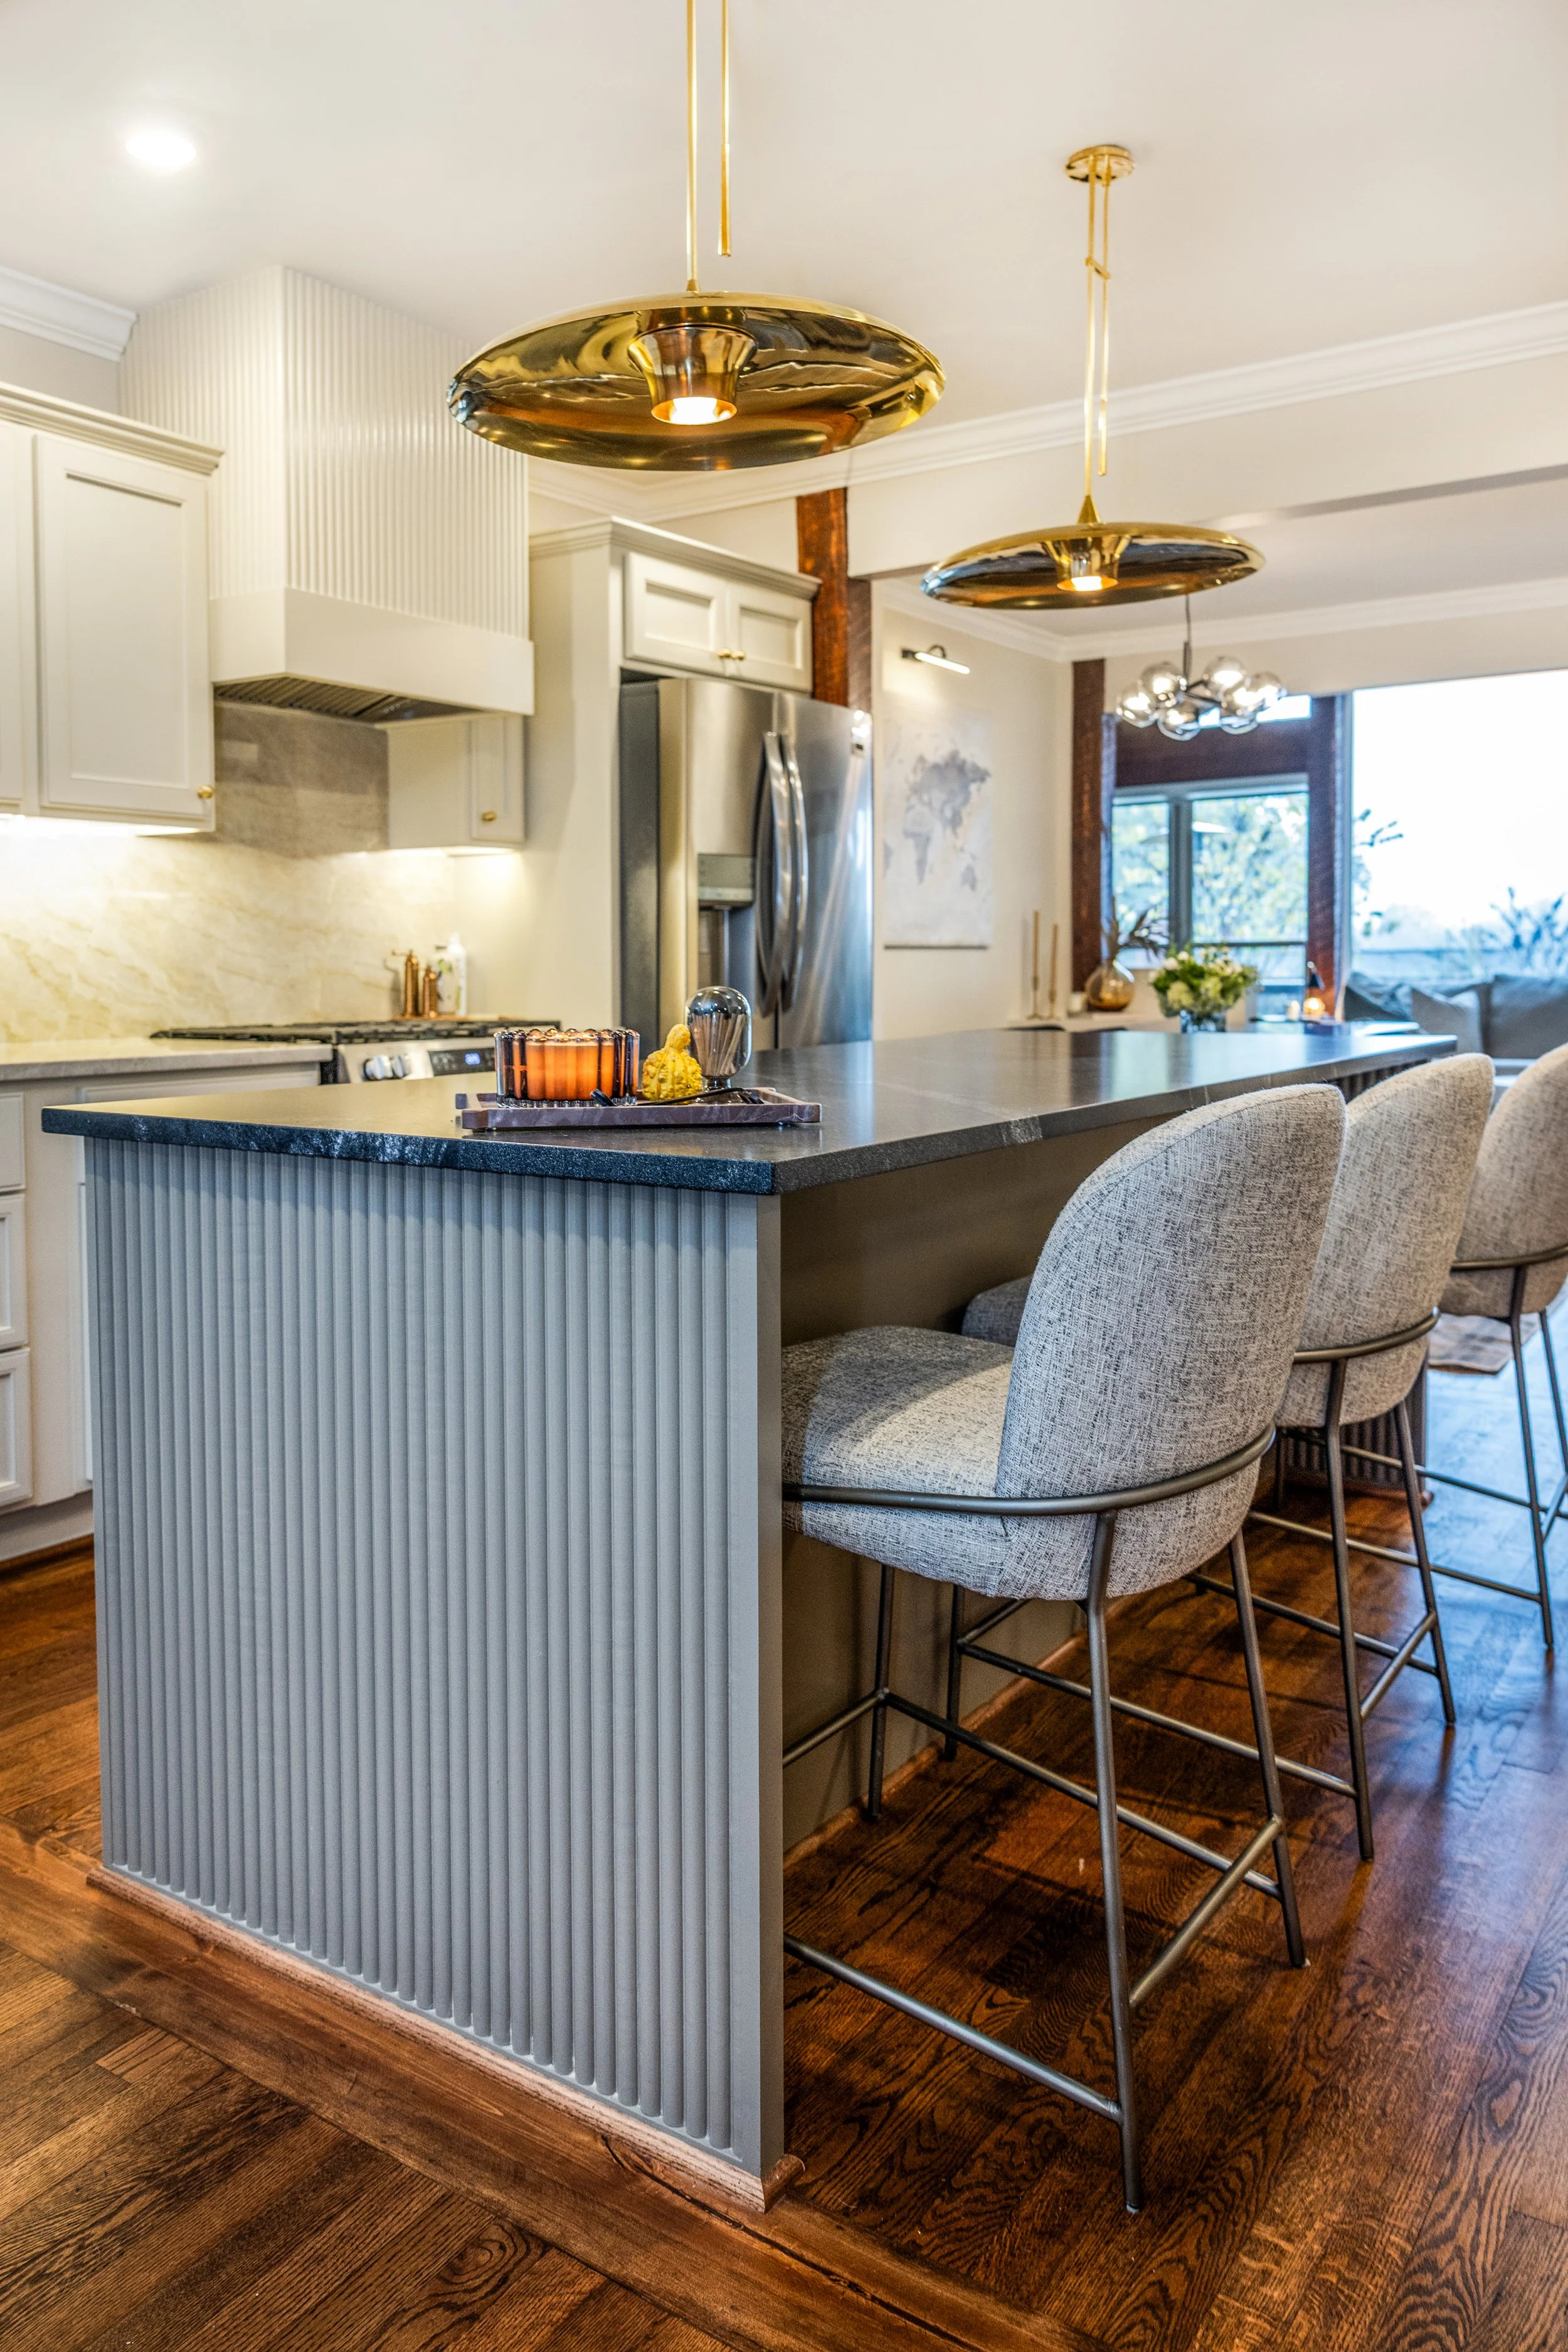
The clients’ previous kitchen layout didn’t provide much storage. Our team countered this by installing a 6-foot long, solid oak island. The island anchors the newly opened floor plan, and increases storage with deep drawers, and provides seating.
Appliance and Electrical Placement
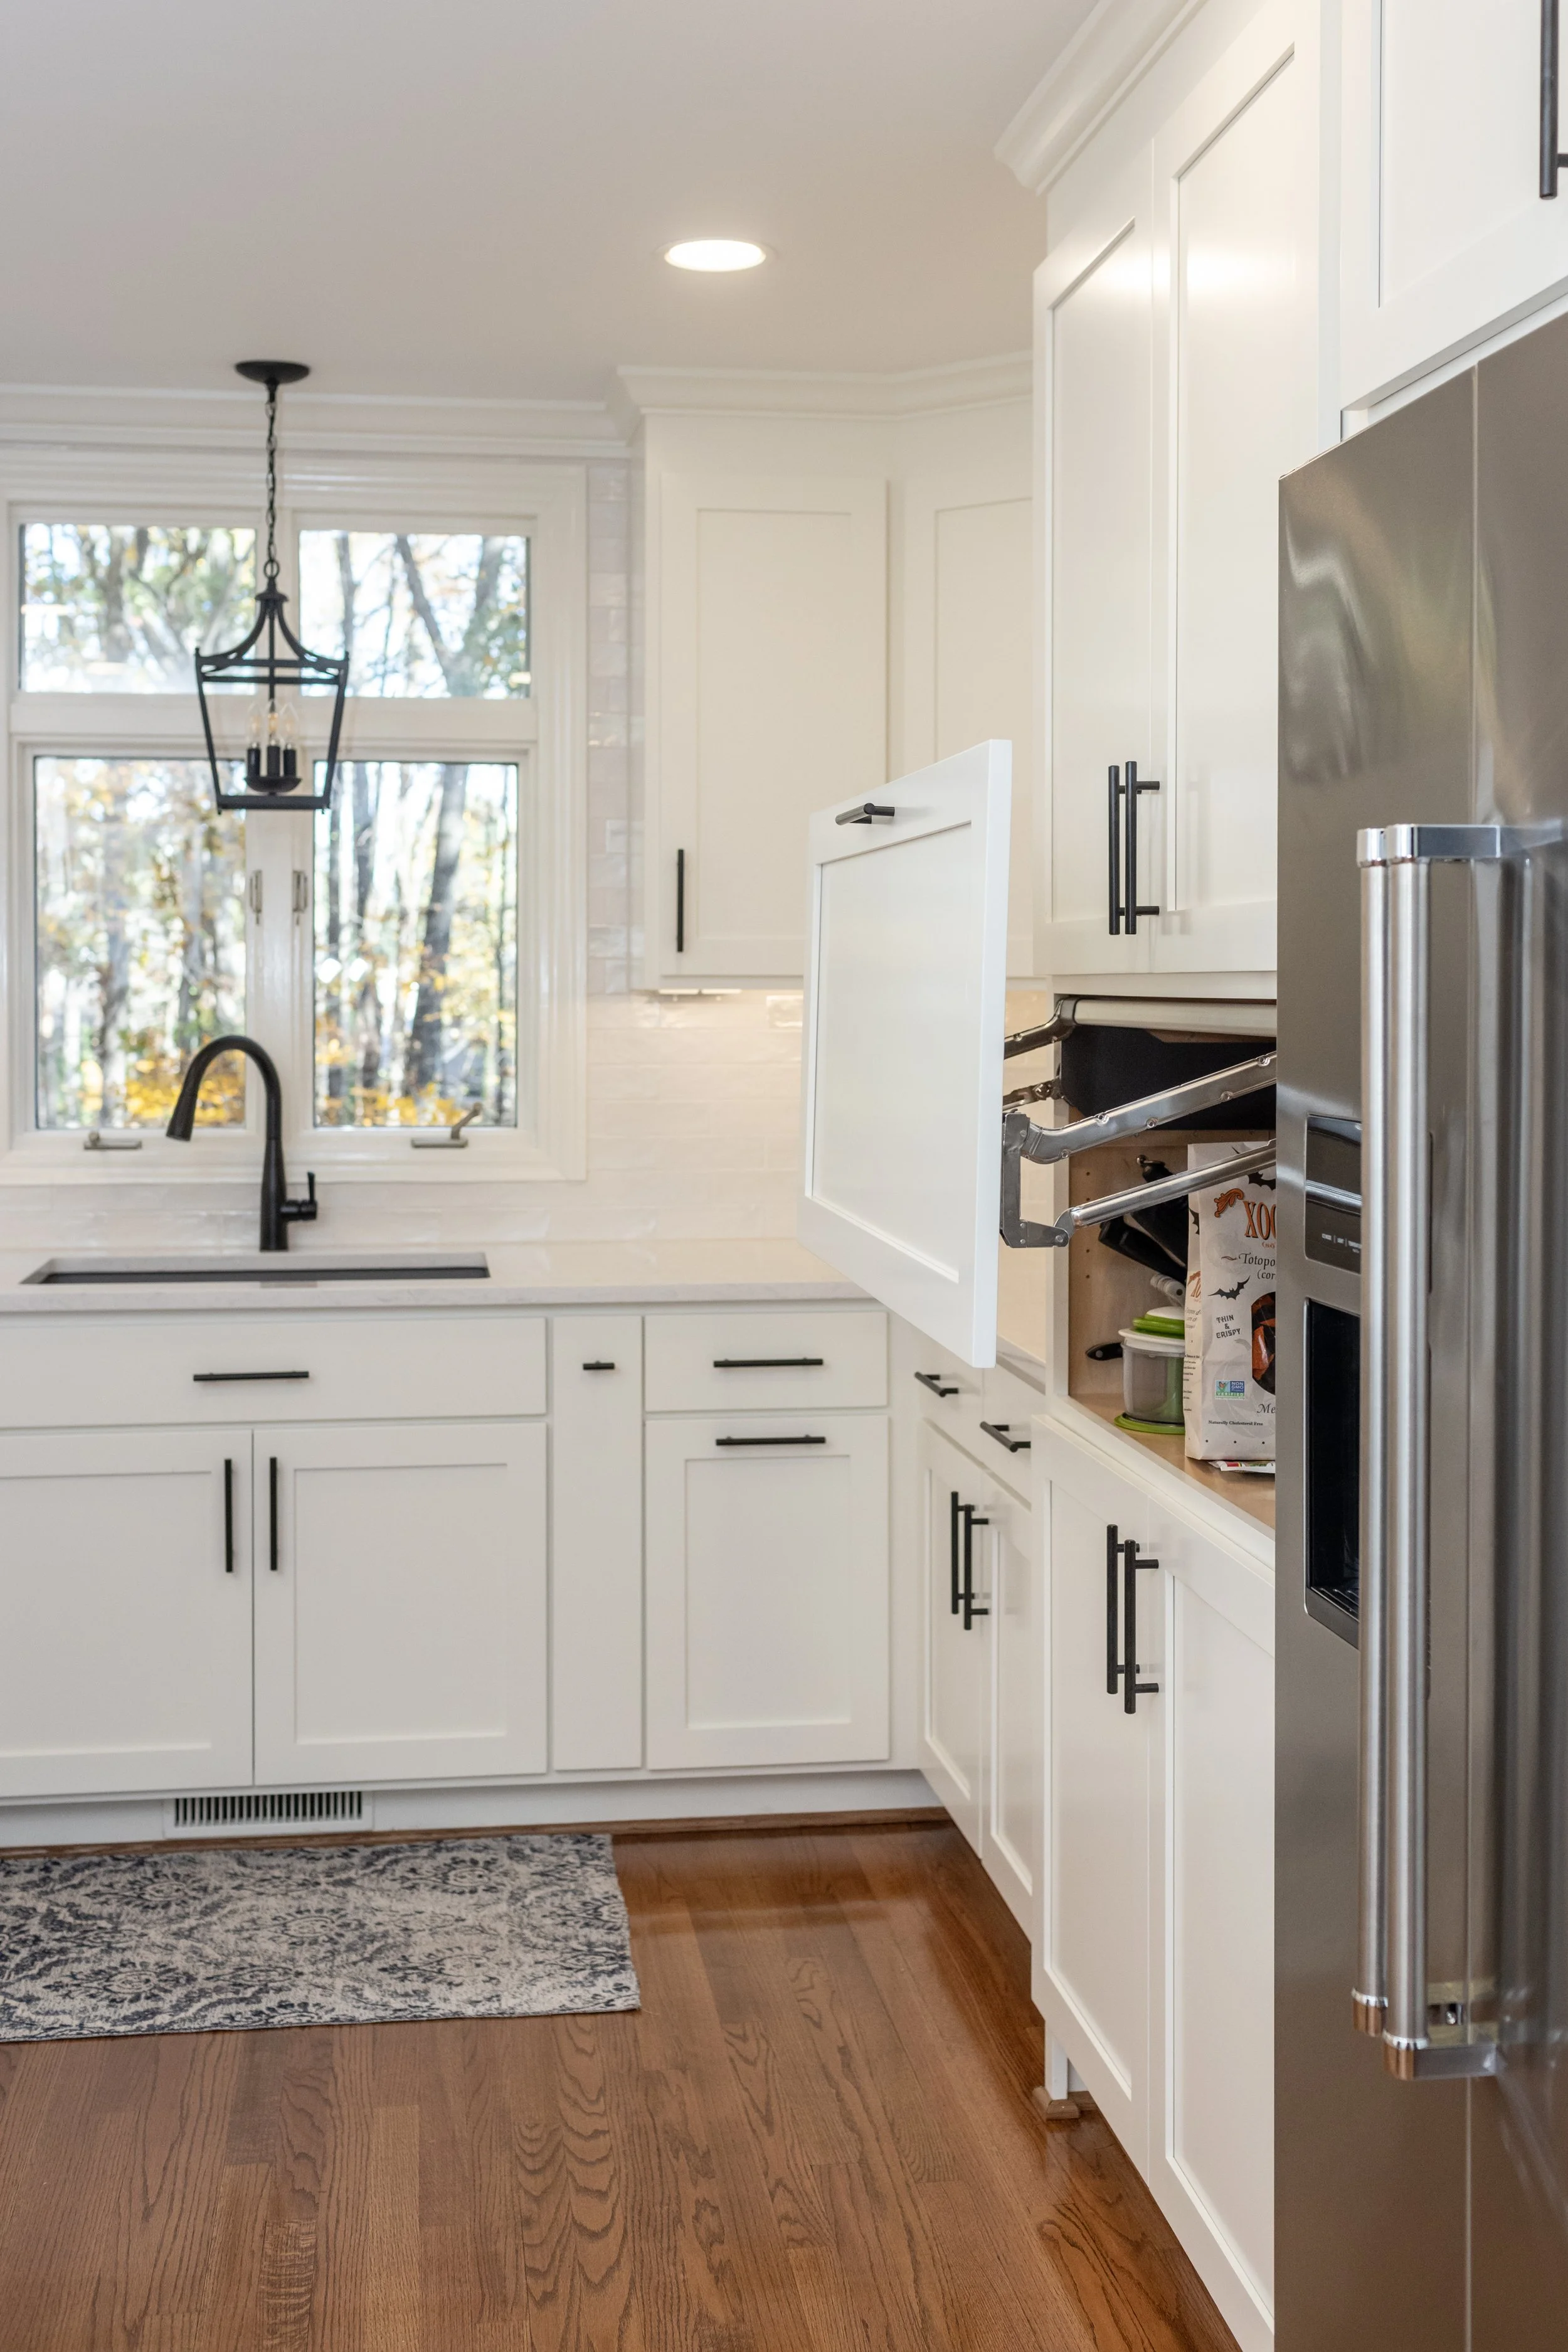
The original layout had appliances scattered throughout the boxed-in kitchen. The new design places the large appliances all within arms reach. The refrigerator was relocated to the left of the stove. The microwave was moved to its own custom-sized nook under the island.
The kitchen’s outlets and switches are now beneath the upper cabinets. Under-mounted outlets and switches create a more cohesive look by keeping switch plates out of sight.
Incorporating Timeless Design
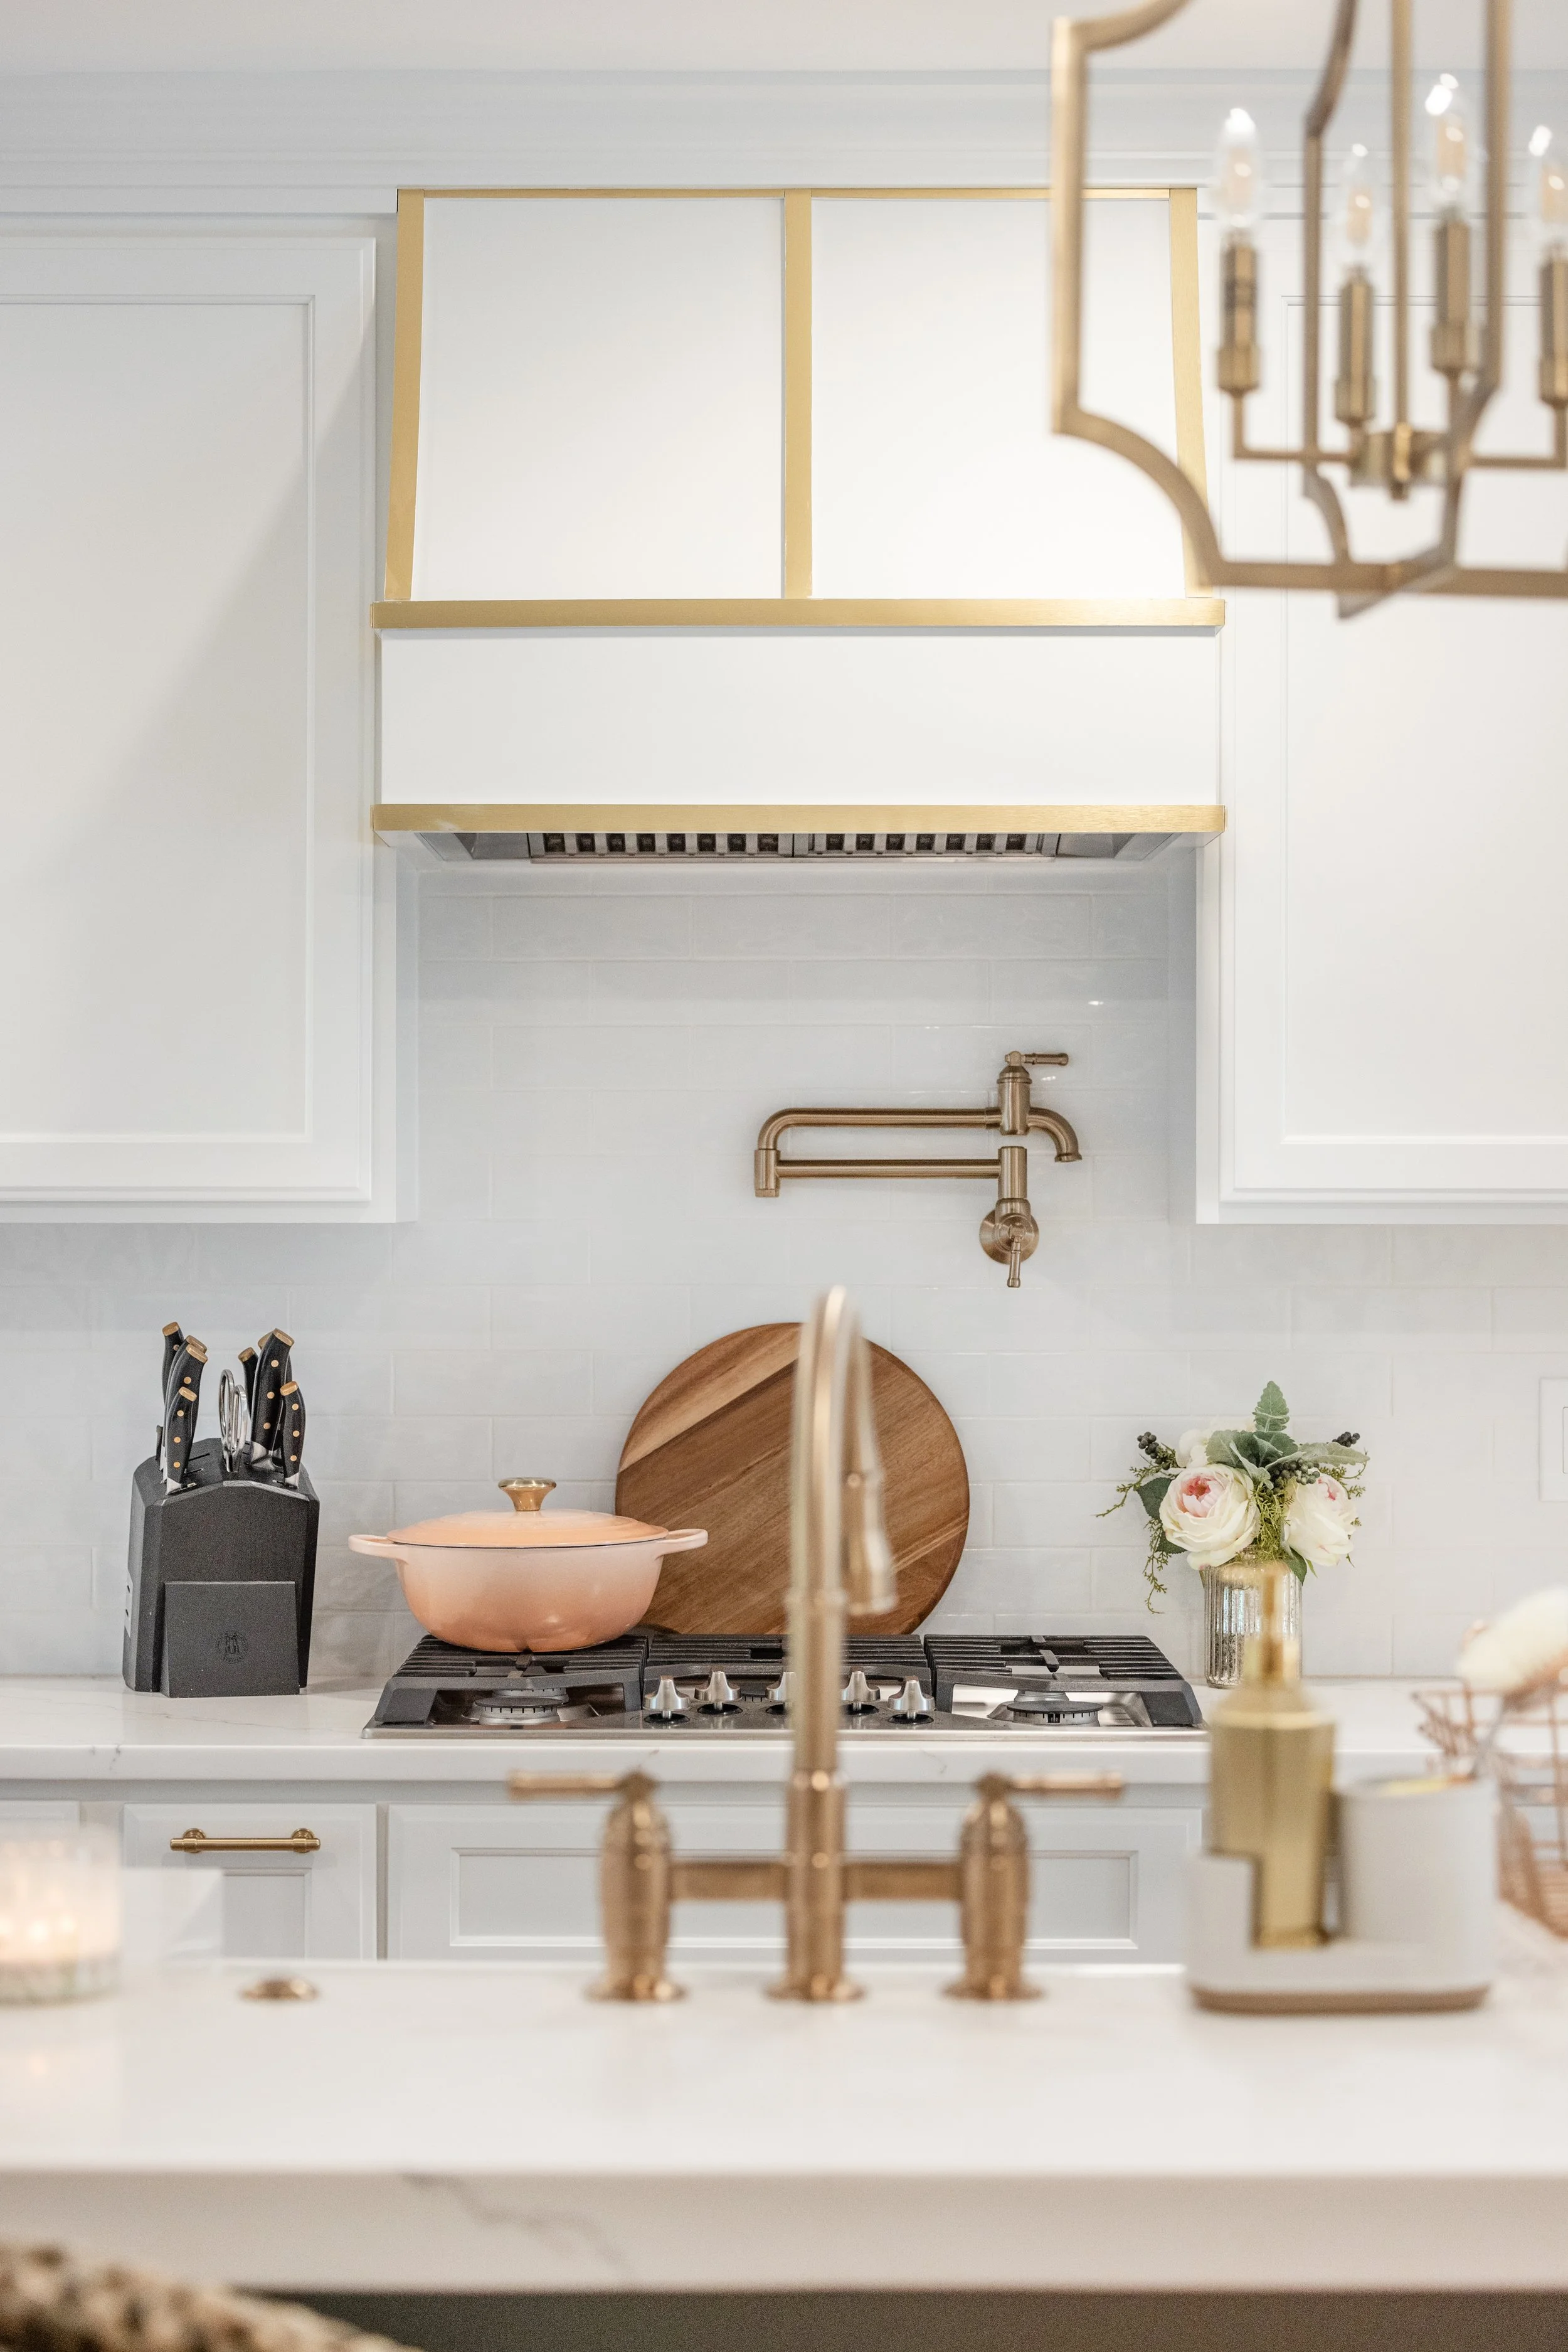
Our clients chose a classic, white hue in Sherwin Williams Pure White for their custom kitchen and butler pantry cabinets. The kitchen would have been beautiful and timeless in all white with its quartz countertops and textured backsplash. However, the incorporation of oak accents and a checkerboard pattern tile floor creates a rich and inviting space with an old school charm.
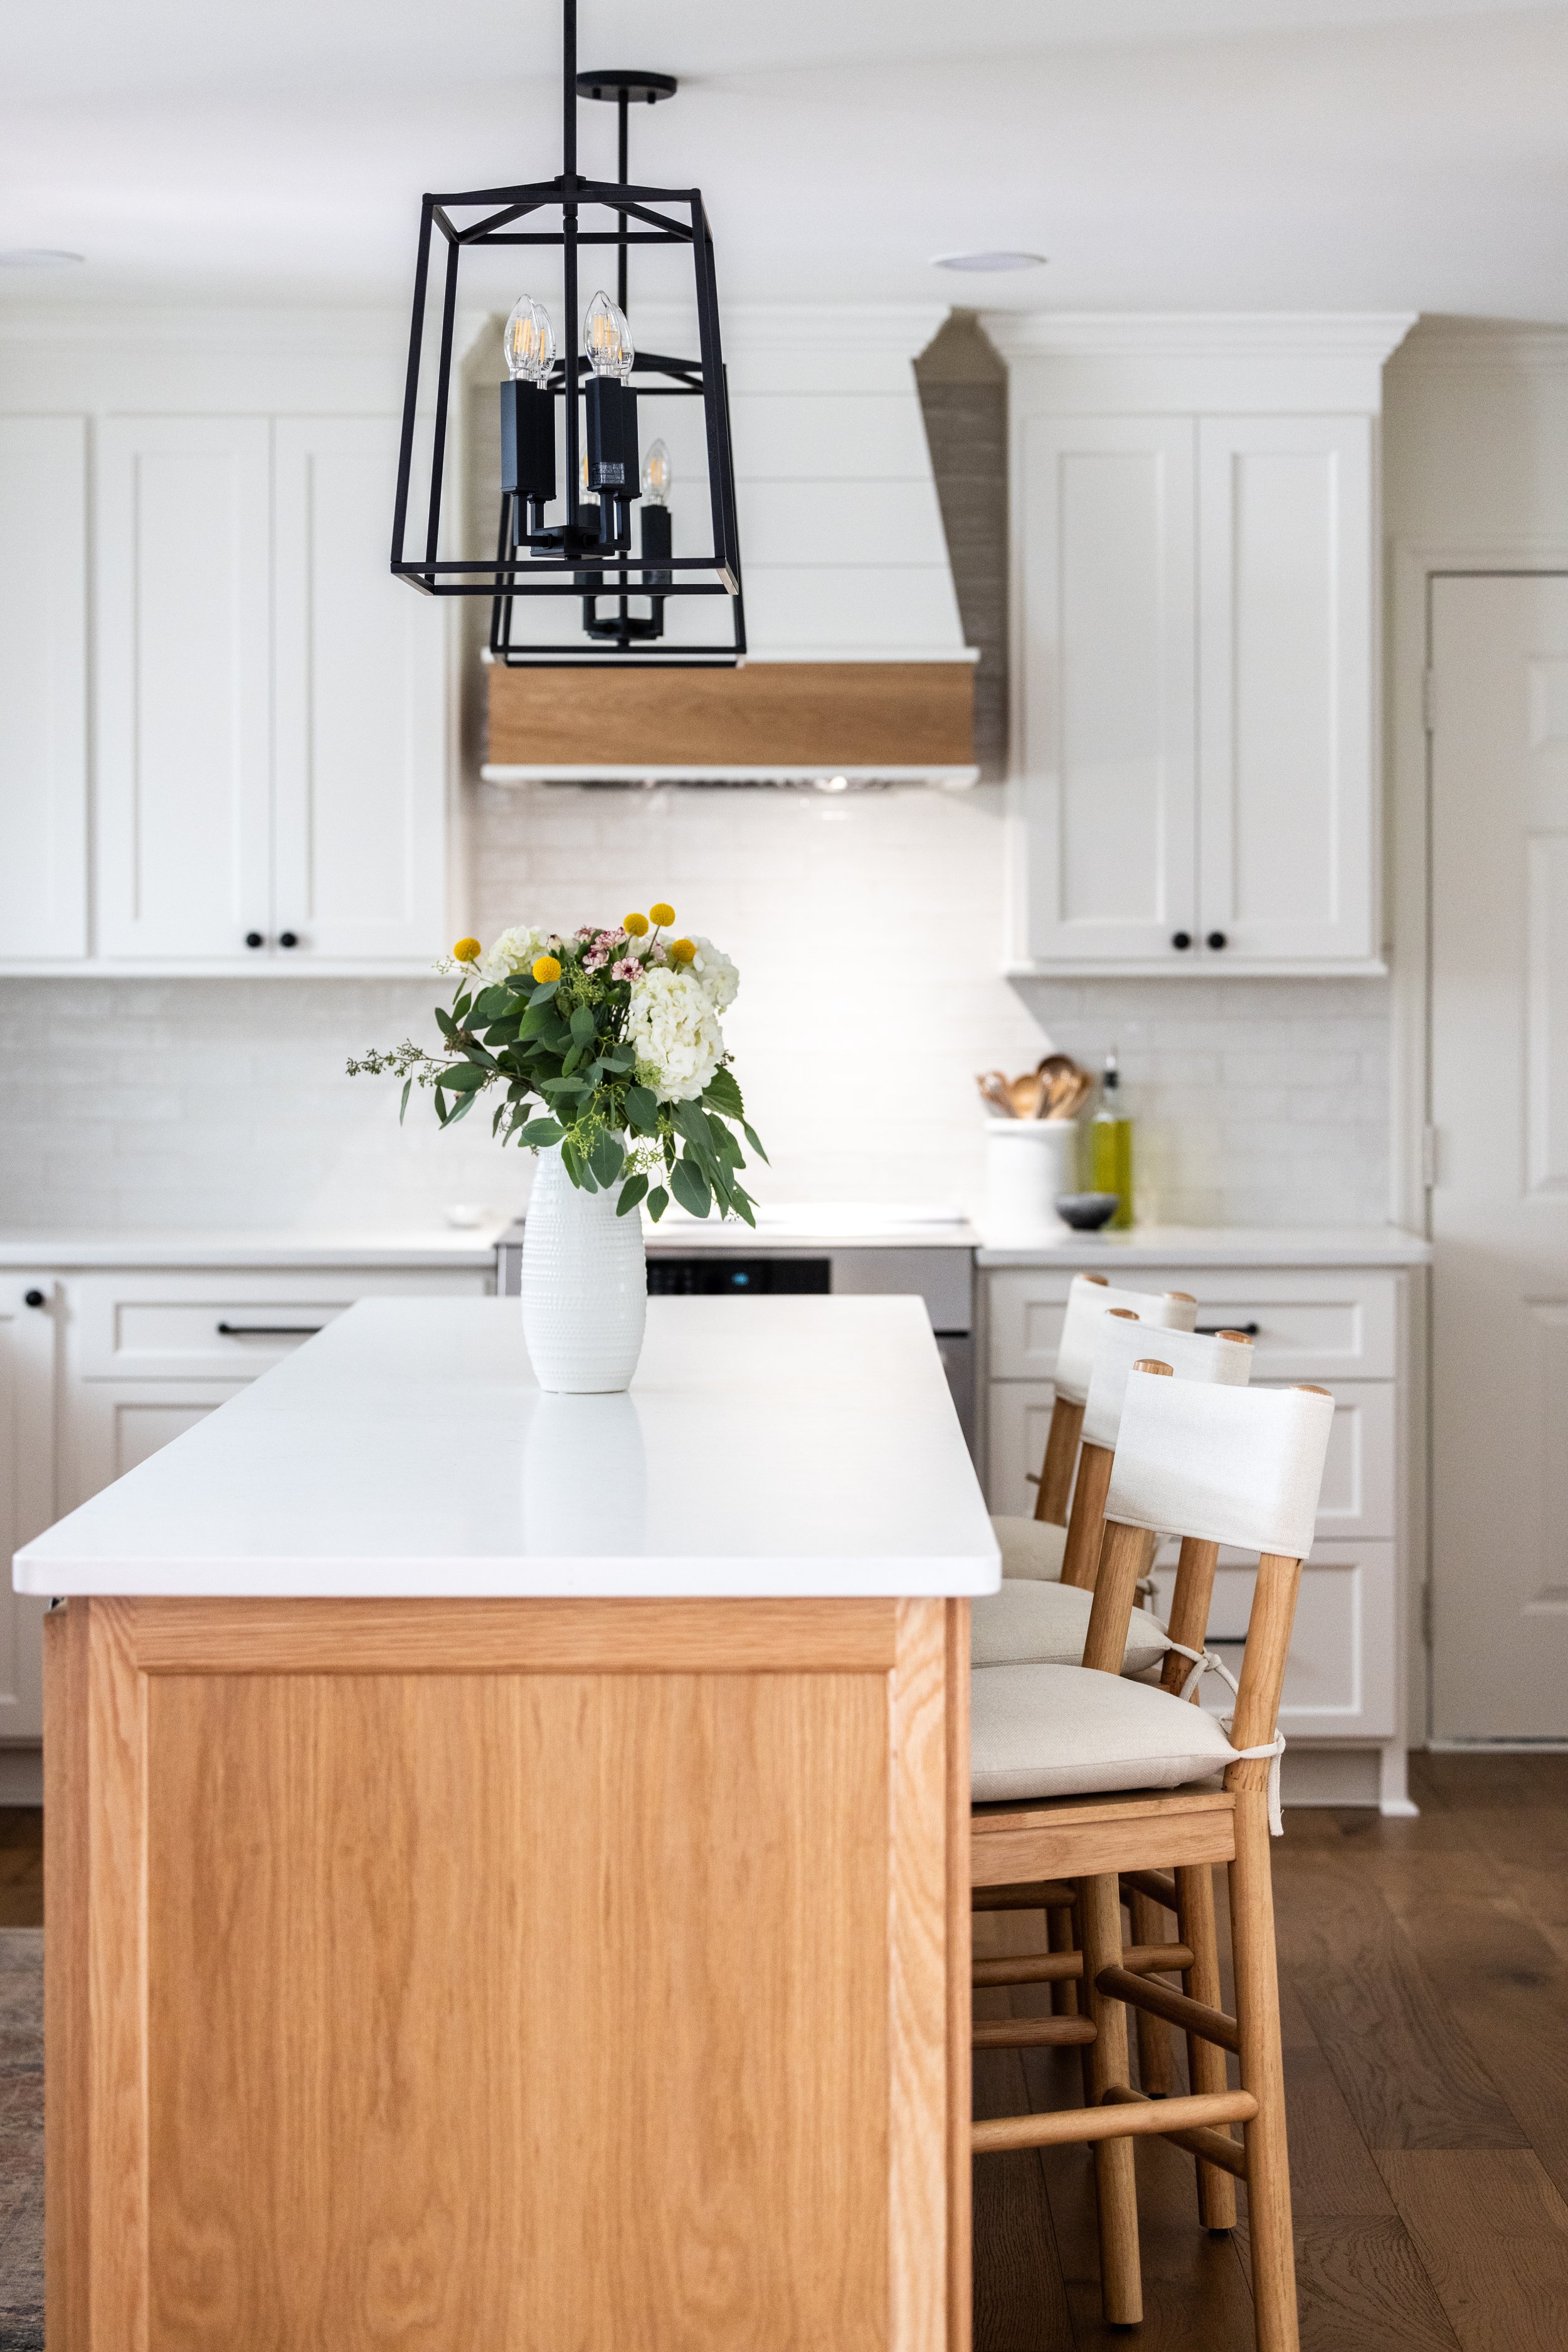
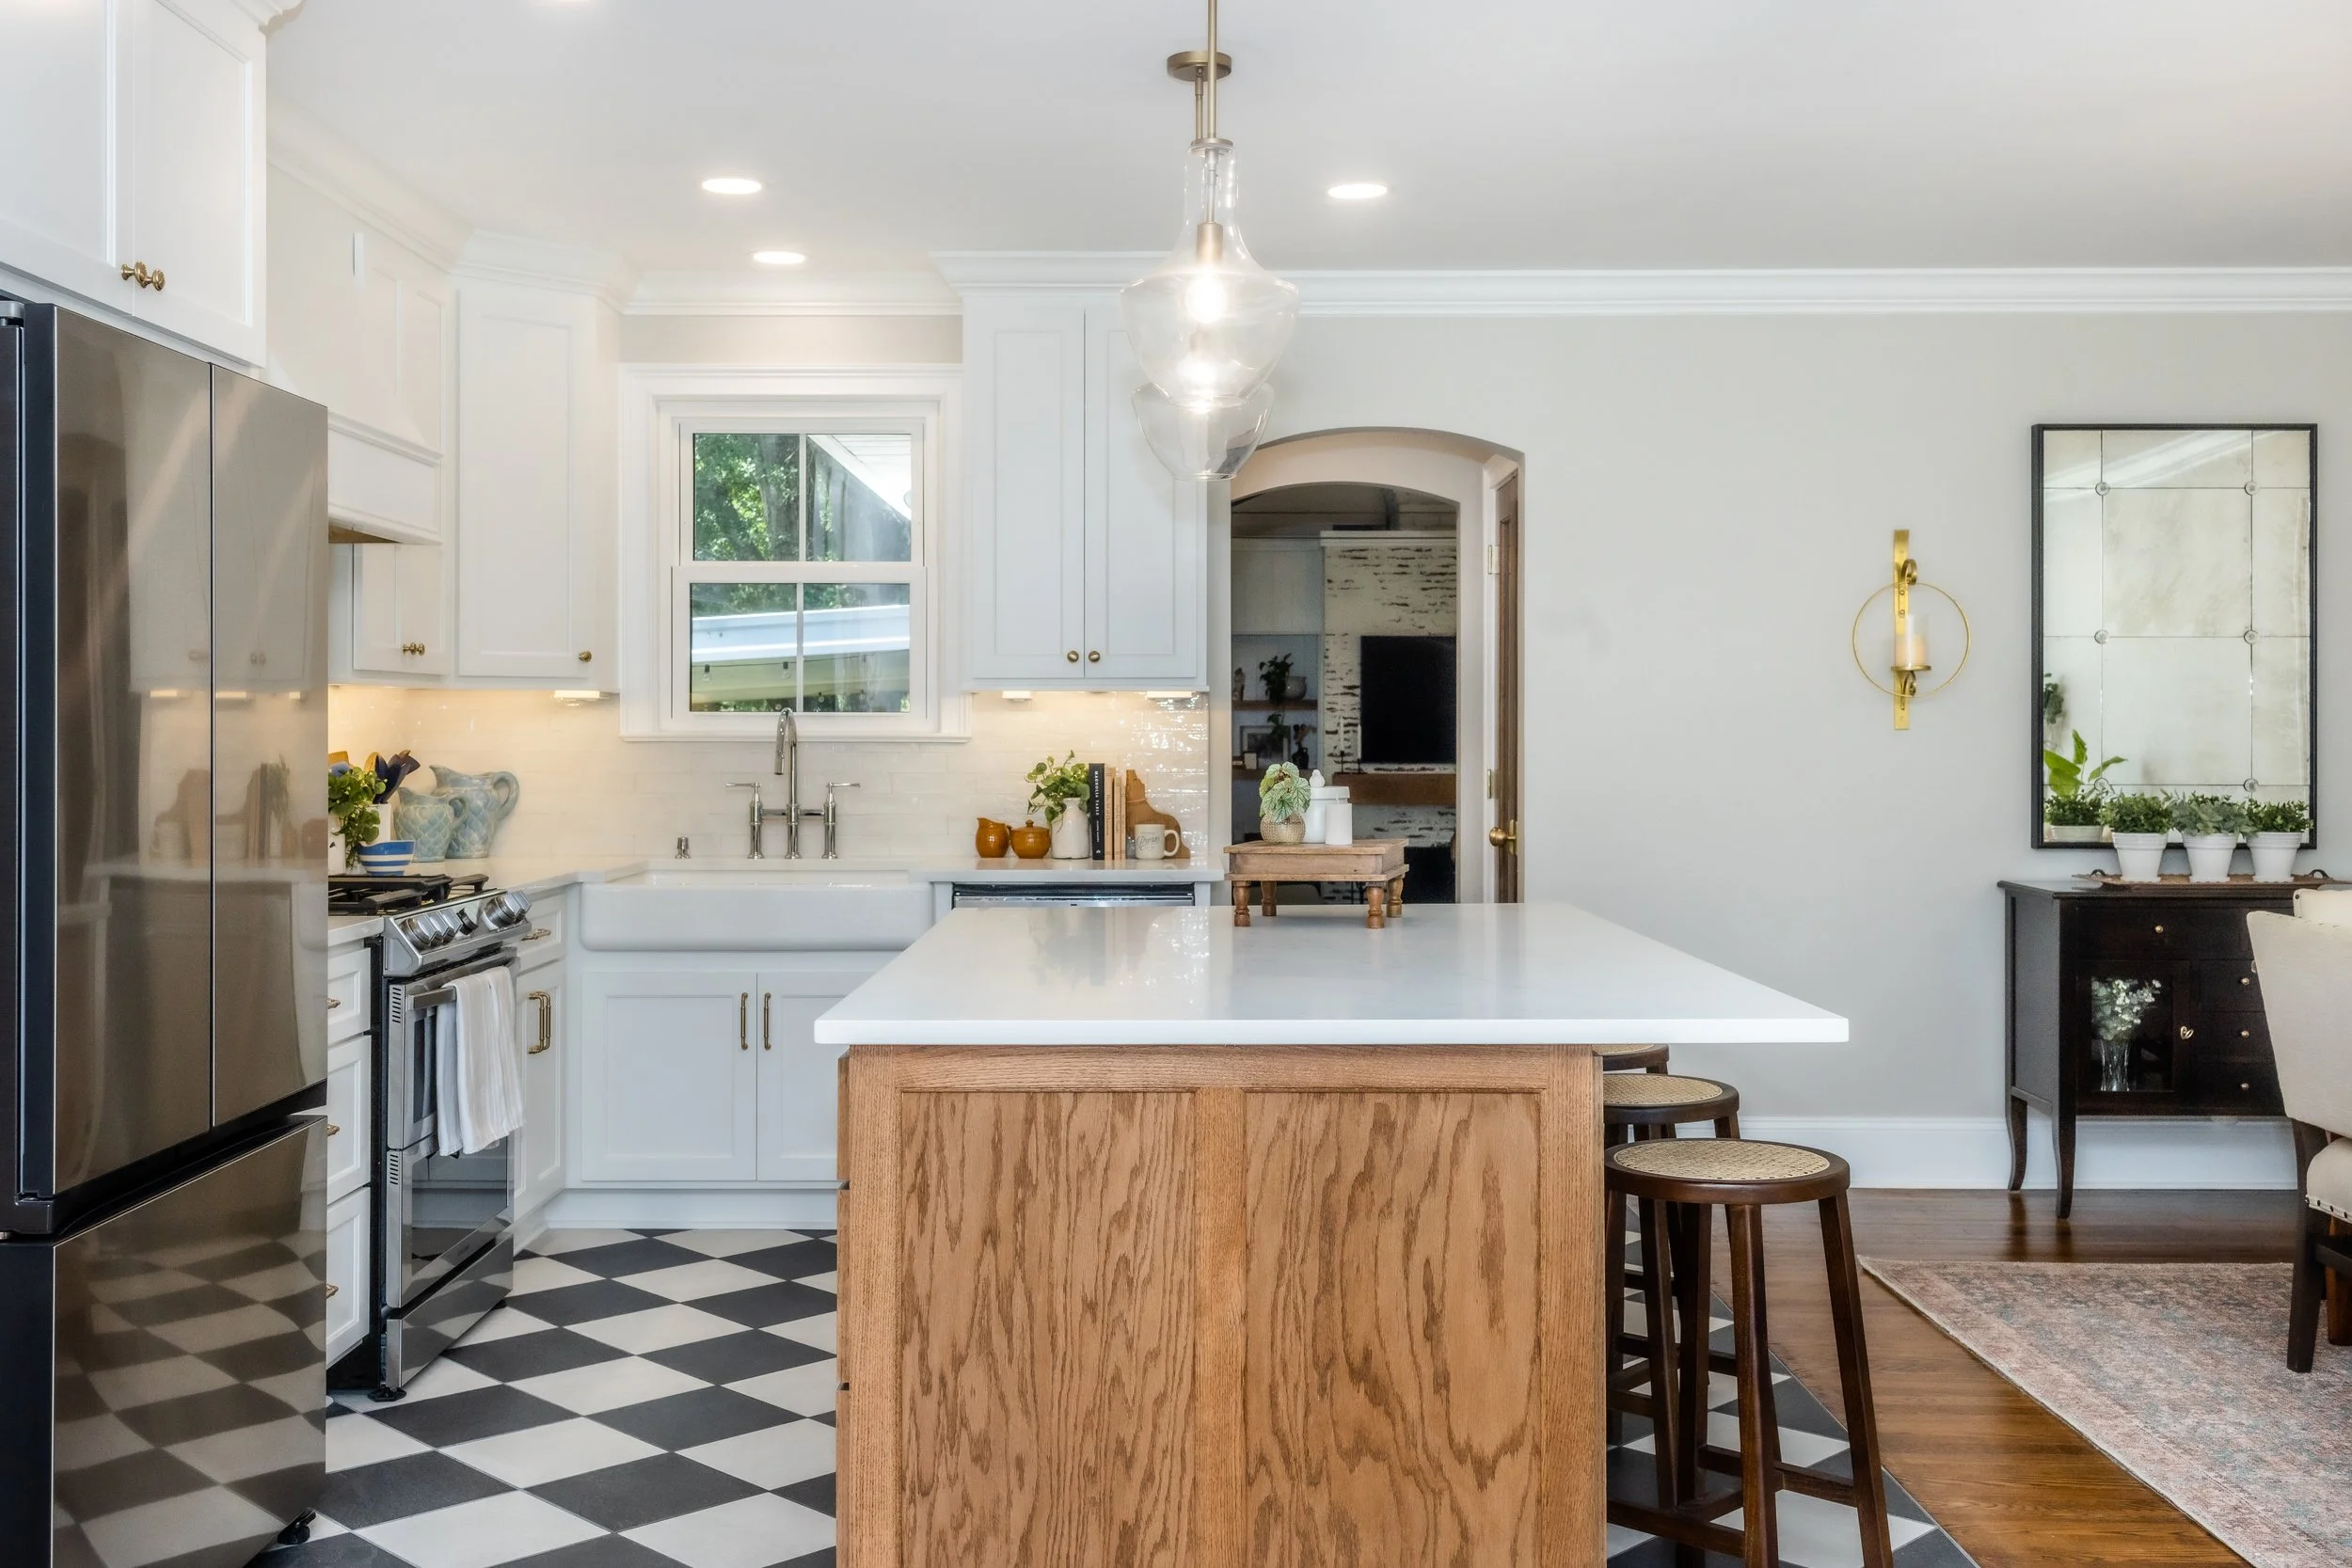
Island
The addition of rich oak accents pairs beautifully with the kitchen’s white cabinetry. The custom, oak island visually anchors the kitchen and living areas’ new open floor plan. Our clients chose Minwax, Special Walnut to stain the island. The medium hue brings out the solid oak island’s natural wood grain.
Butler’s Pantry
Our clients’ oak and white design aesthetic carries through to their walk-in, butler’s pantry. The pantry design utilizes a hallway that opens into a secondary living area. One side of the hallway is lined with custom cabinetry that doubles as a dry bar. The other side has solid oak french doors that open into a walk-in pantry. The french doors and built-in bar not only maximize this home’s square footage, they also give a feeling of luxury to the space.
Checkerboard Tile Floor
Is there any combination more iconic than black and white? Our clients chose to take a break from the ordinary and install a checkerboard pattern in black and white tile. The tile floor doesn’t just bring visual interest to the space, it's also a practical, durable solution for a high-traffic kitchen.
P.S. Did you notice that the floor’s diamond pattern carries through to the pantry’s upper cabinets? It's all in the details!
Kitchen Gallery


3 Steps to Finding Balance in Your Home Design
Whether you are drawn to contemporary looks, or veer towards classic silhouettes— here are three fool-proof steps to help you create a timeless, balanced look in your own home.
Choose a Complementary Color Palette
The first step in creating a balanced kitchen design is selecting the right color palette to set the mood for your space. Your chosen colors should complement each other while also creating an eye-catching contrast. Whichever color palette you choose, make sure to keep your hues and finishes to a minimum. Too many shades will overwhelm the eye and keep any of your choices from standing out. Options range from bold and dramatic combinations to more subtle and understated ones. Some popular pairings include:
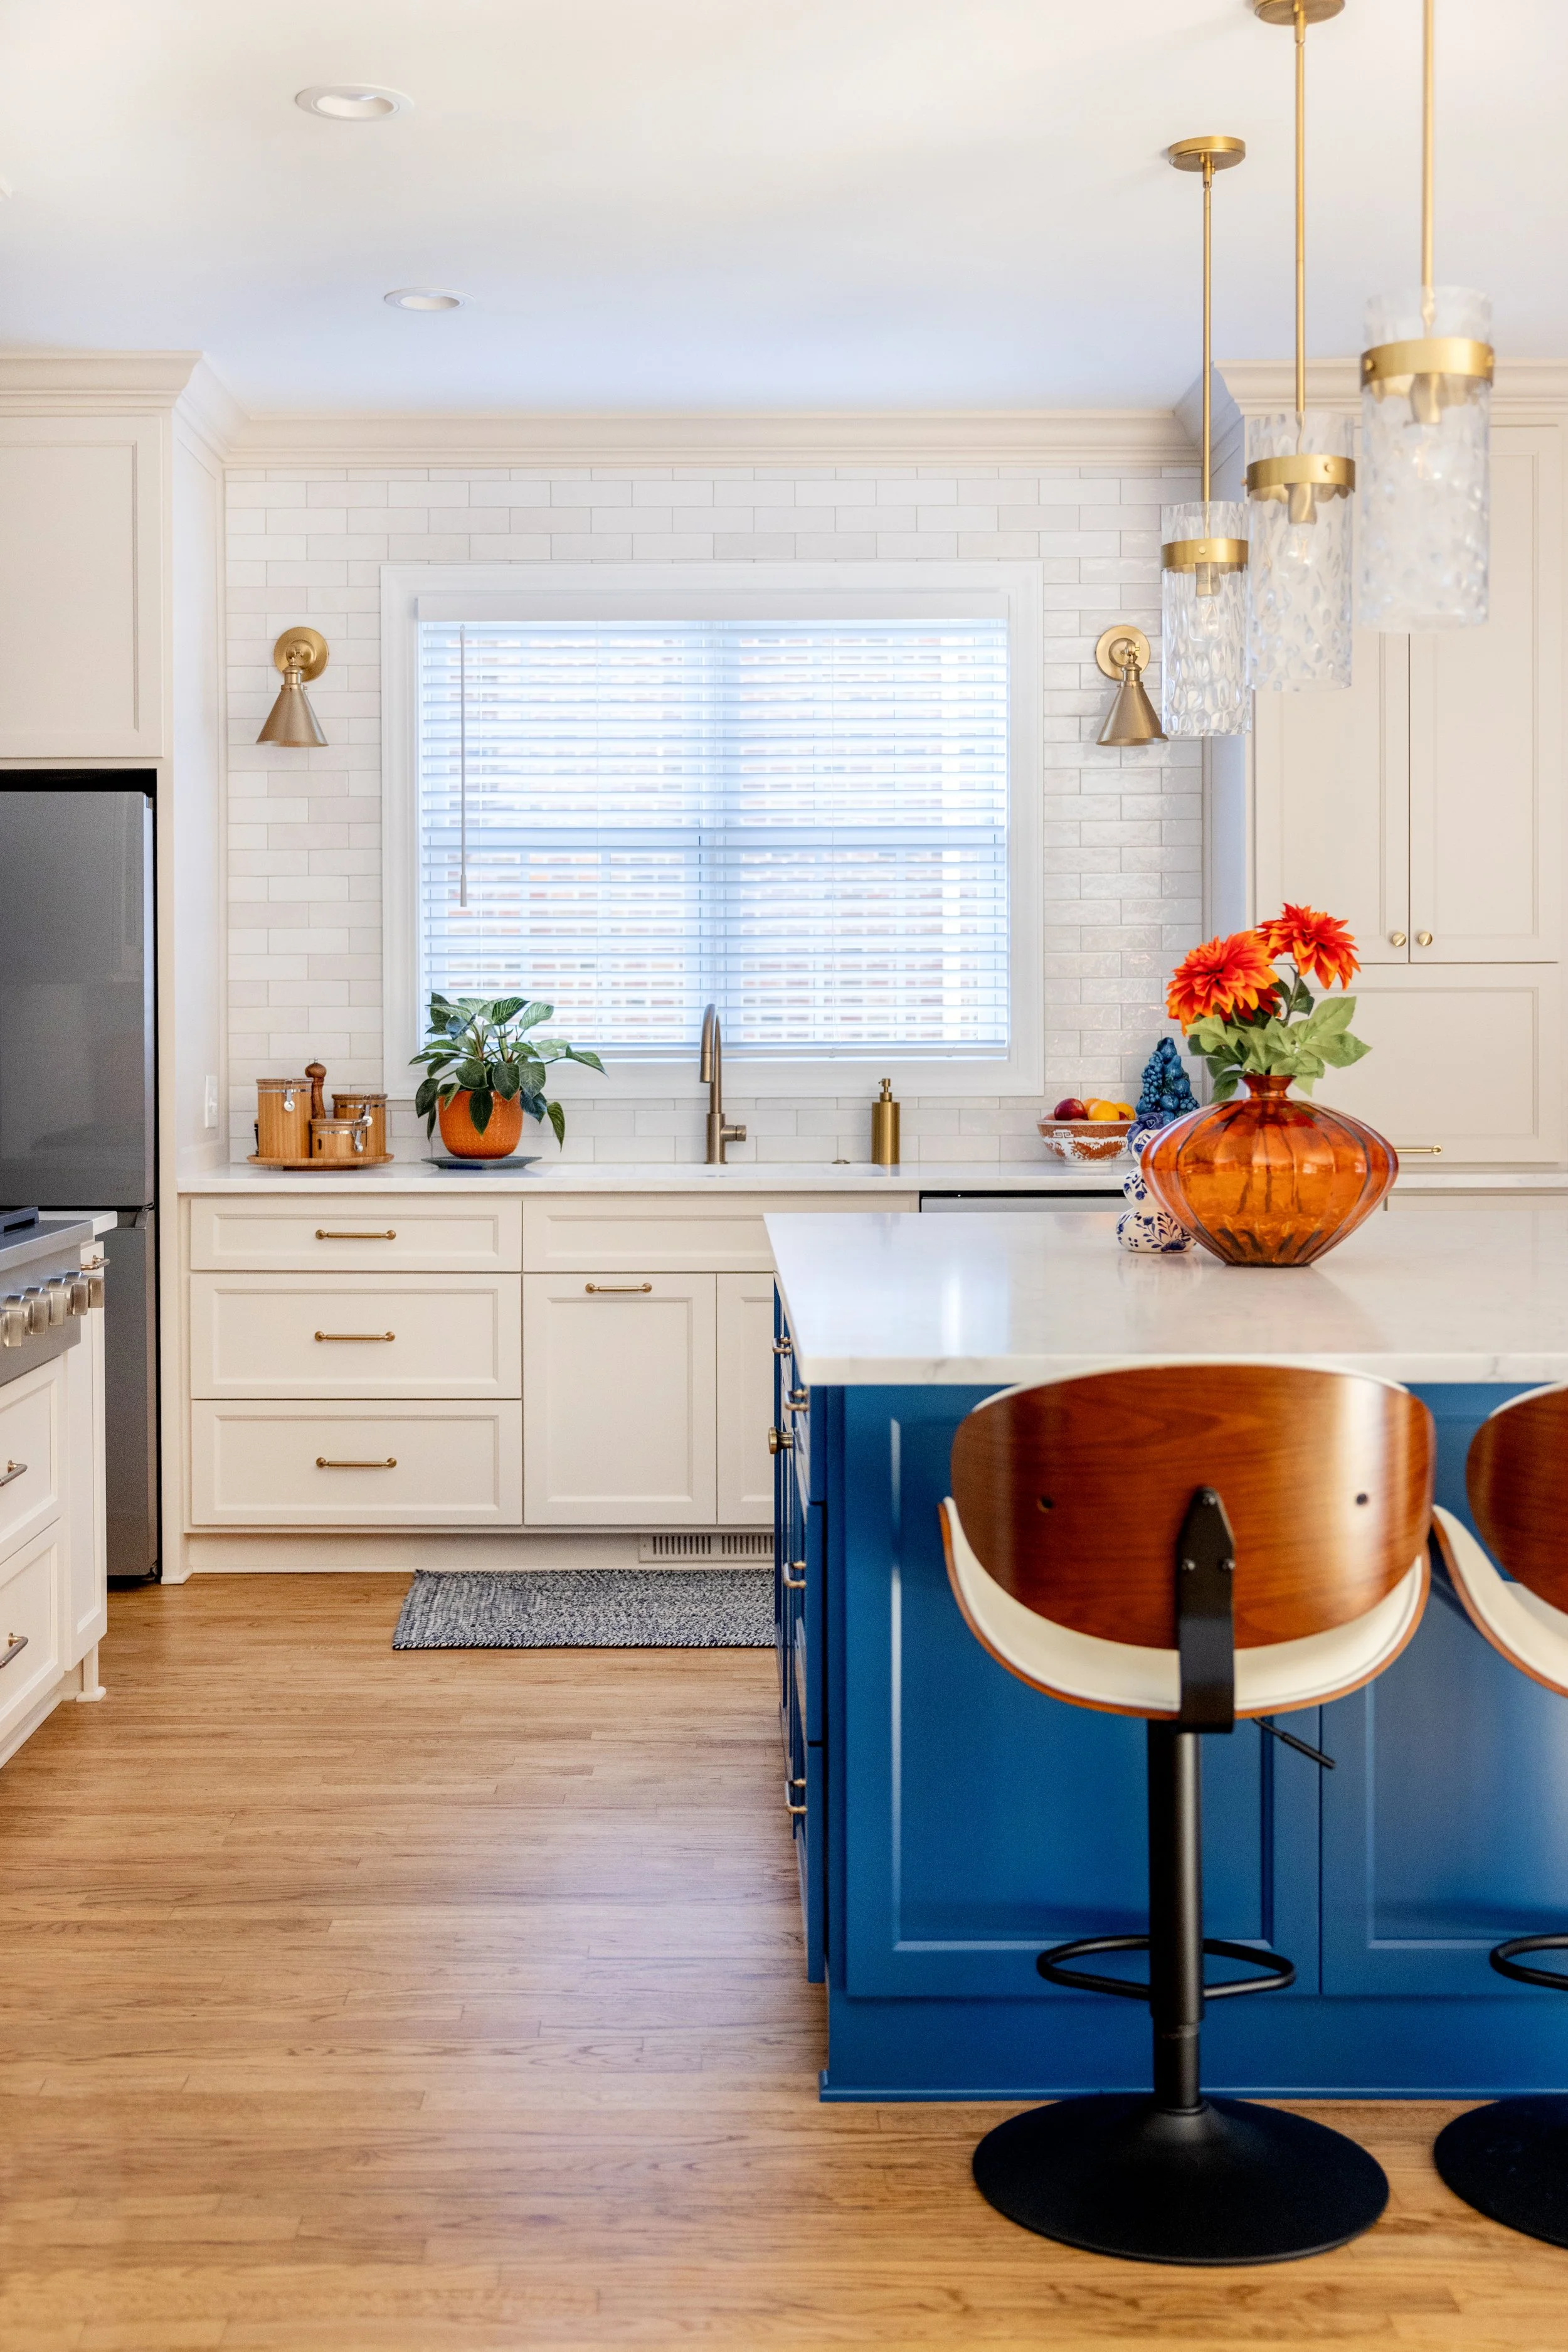
Contrasting Colors: Choosing colors from the opposite ends of the color wheel, like navy blue and a warm yellow, or deep charcoal and blush pink will create a striking visual impact.
Neutral and Bold: Combine neutral tones like white, gray, or beige with a bold, vibrant color like emerald green or a deep red. The vibrant hue will pop against the neutral backdrop.
Light and Dark: Opt for a classic combination of light and dark shades, such as pairing white cabinets with a rich or dark wood or black and white floors like our clients. This provides an elegant contrast that stands the test of time.
Create Points of Interest
No matter which space you’re redesigning, incorporating points of interest is key to creating a cozy, balanced space. In this kitchen, the oak island anchors the home’s open floor plan. However, a focal point can really be anything. Feel free to get creative with your point of interest from bold artwork to a freestanding bathtub– or even a checkerboard floor!
Our clients’ black and white checkerboard floor delegates a “kitchen zone” in the open floor plan as well as offers a practical, durable, surface for the high-traffic area.
Likewise, our clients’ arched doorways leading out of the kitchen draw the eye upwards and contrast nicely with the square pattern on the floor.
Having various points of interest encourages the eyes to bounce around the room. But don’t overdo it- as with the color palette- incorporating too many points will make the space feel disjointed.
Keep It Consistent
Use your chosen palette and accents consistently throughout the space to give it a cohesive feel. Our clients chose to extend their checkerboard tile floor, white cabinets, and oak accents into the butler pantry. Now, instead of the pantry and bar serving as a transitional hallway into the den, it looks and functions as a part of the kitchen.
Likewise, incorporating your color palette and finishes into other rooms with furniture and accents will give your home a cohesive, designer feel.
Before and After
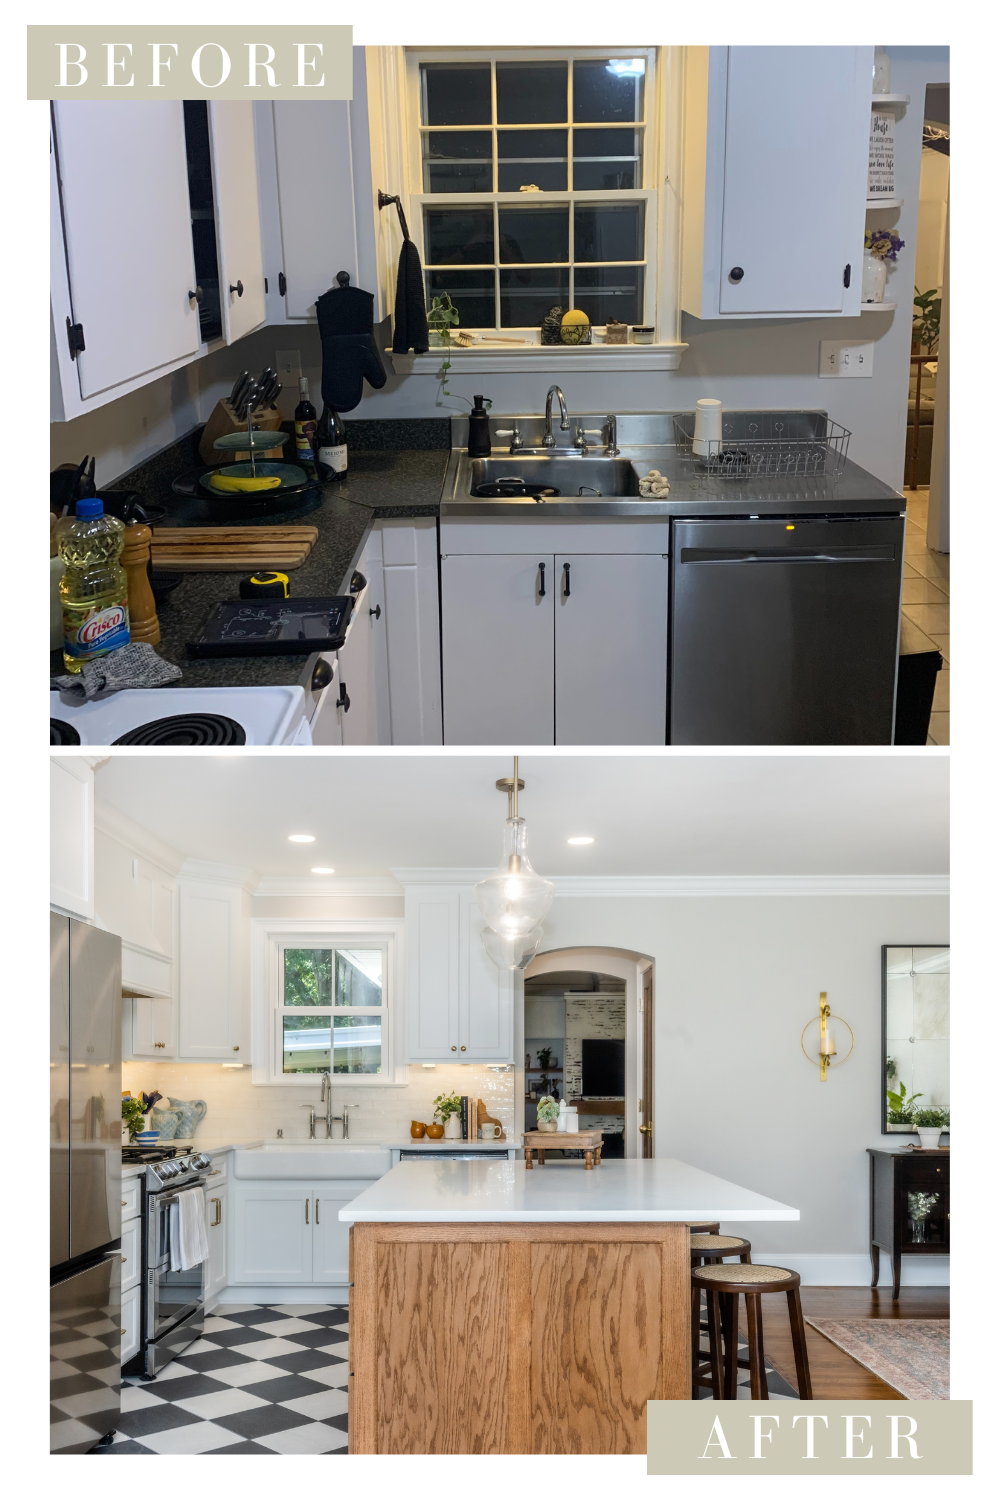
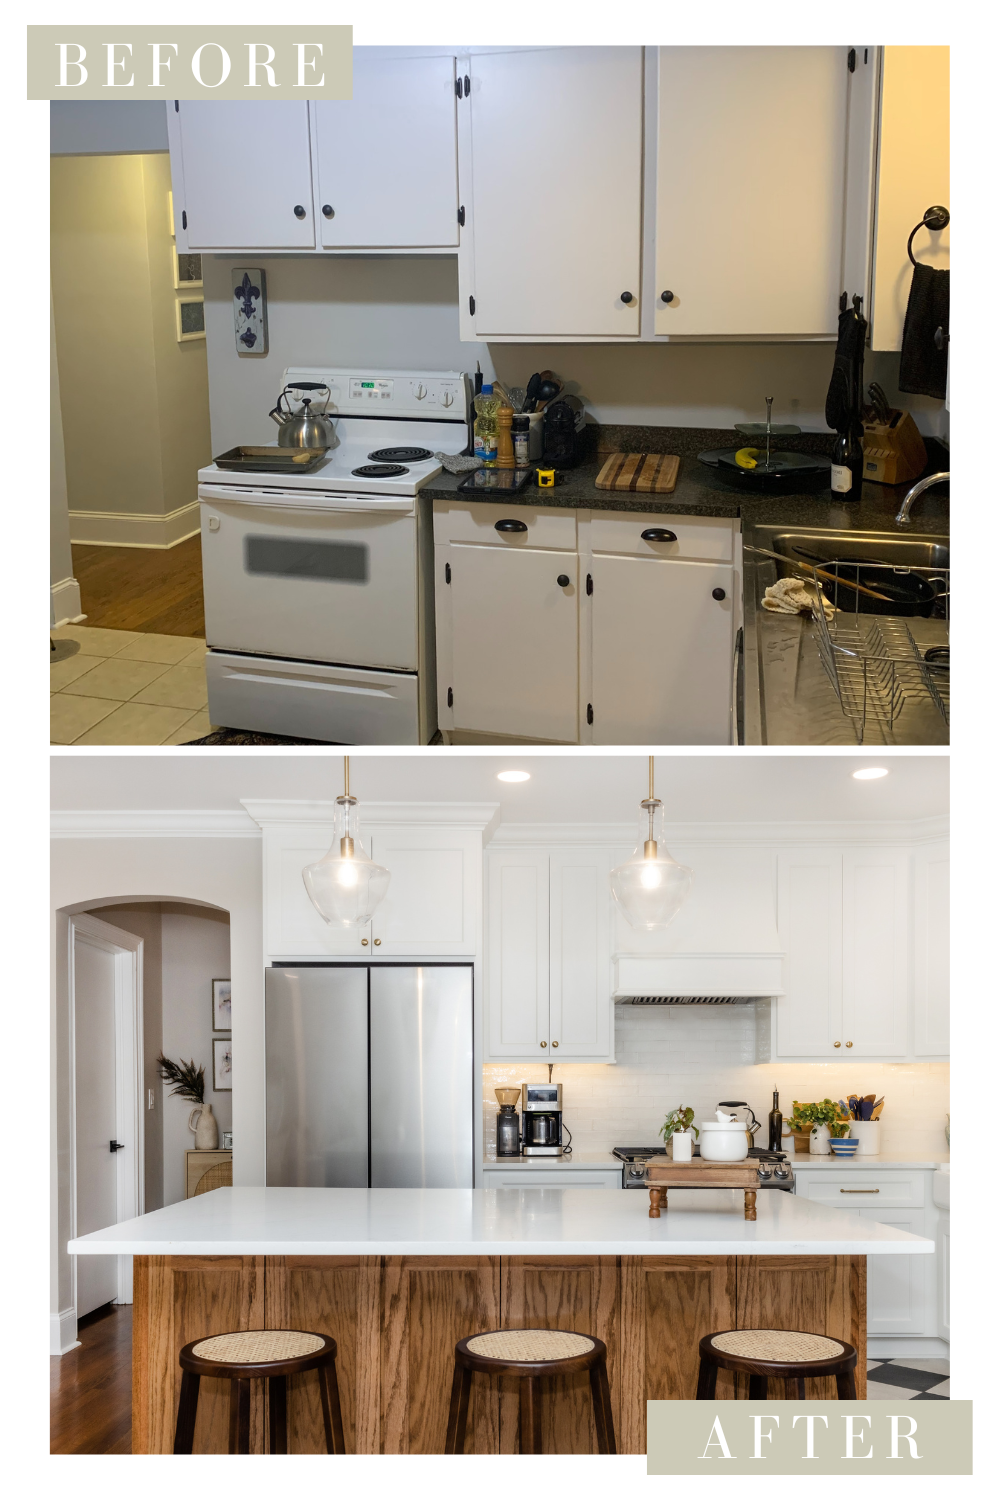
At Ashmore Builders, we are dedicated to unlocking your home’s full potential. We specialize in creating and implementing one-of-a-kind designs that optimize your home through custom cabinetry and storage solutions. Our clients’ kitchen two-tone kitchen renovation is proof that one doesn’t need to have ample square footage to create an eye-catching and functional space in your home. Furthermore, consistently utilizing a complimentary color scheme and incorporating points of interest creates more visual depth and adds personality to the space. If you are looking to revive your home, or just want to make it more functional for your family’s changing needs, contact us today!
Selections
Paint
Oak island stain is Special Walnut by Minwax.
Cabinets are painted Sherwin Williams Pure White (SW 7005).
Walls are painted Agreeable Gray (SW 7029).
Hard Finishes
Backsplash Bianco Glossy 2x9 tile by Ragno from Clayton Tile.
12”x24” floor tile by Emil Ceramica, custom cut to 12”x12” and laid in a diagonal checkerboard pattern. Purchased through Clayton Tile.
Polished Miami Vena Quartz Countertops from Upstate Granite Solutions.
Fixtures and Accessories
Bridge Faucet, Soap Dispenser, and Disposal Flange by Signature Hardware in chrome finish.
White, under-mount cast iron sink by Kohler, Whitehaven Collection.
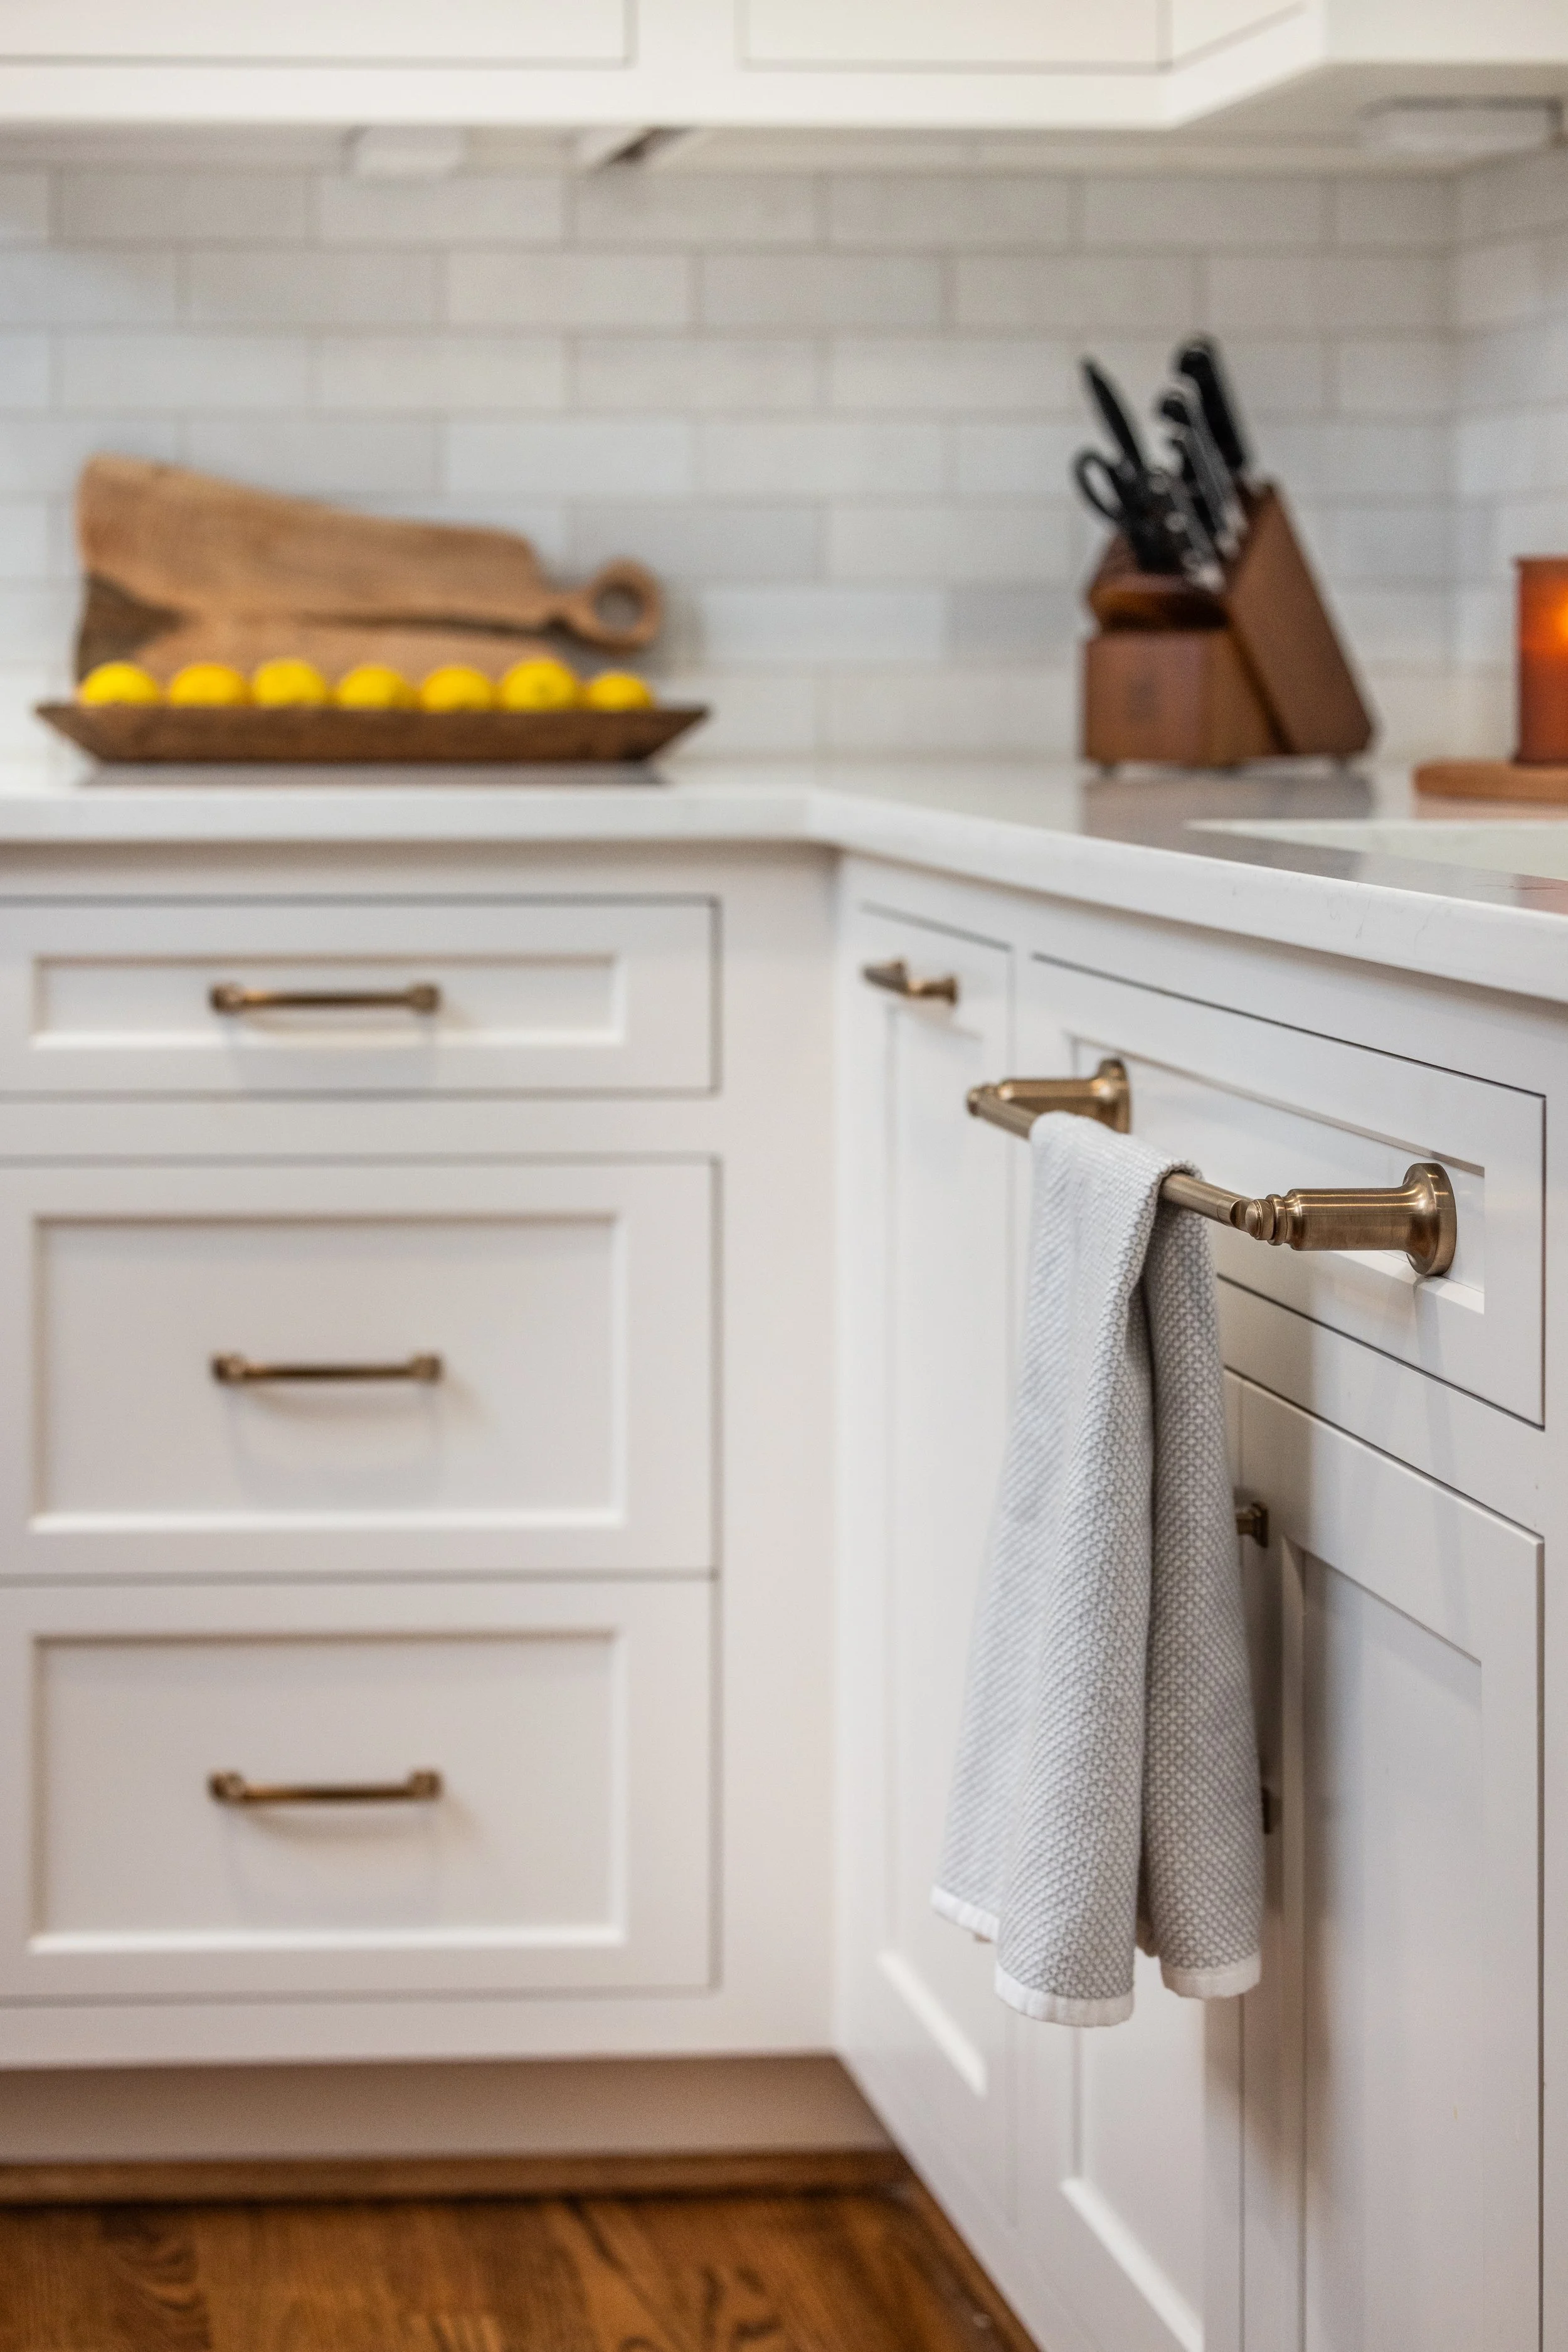
Cabinet knobs in honey bronze by Top Knobs, Barrow Collection.
Cabinet pulls by Top Knobs, Devon Collection in honey bronze.
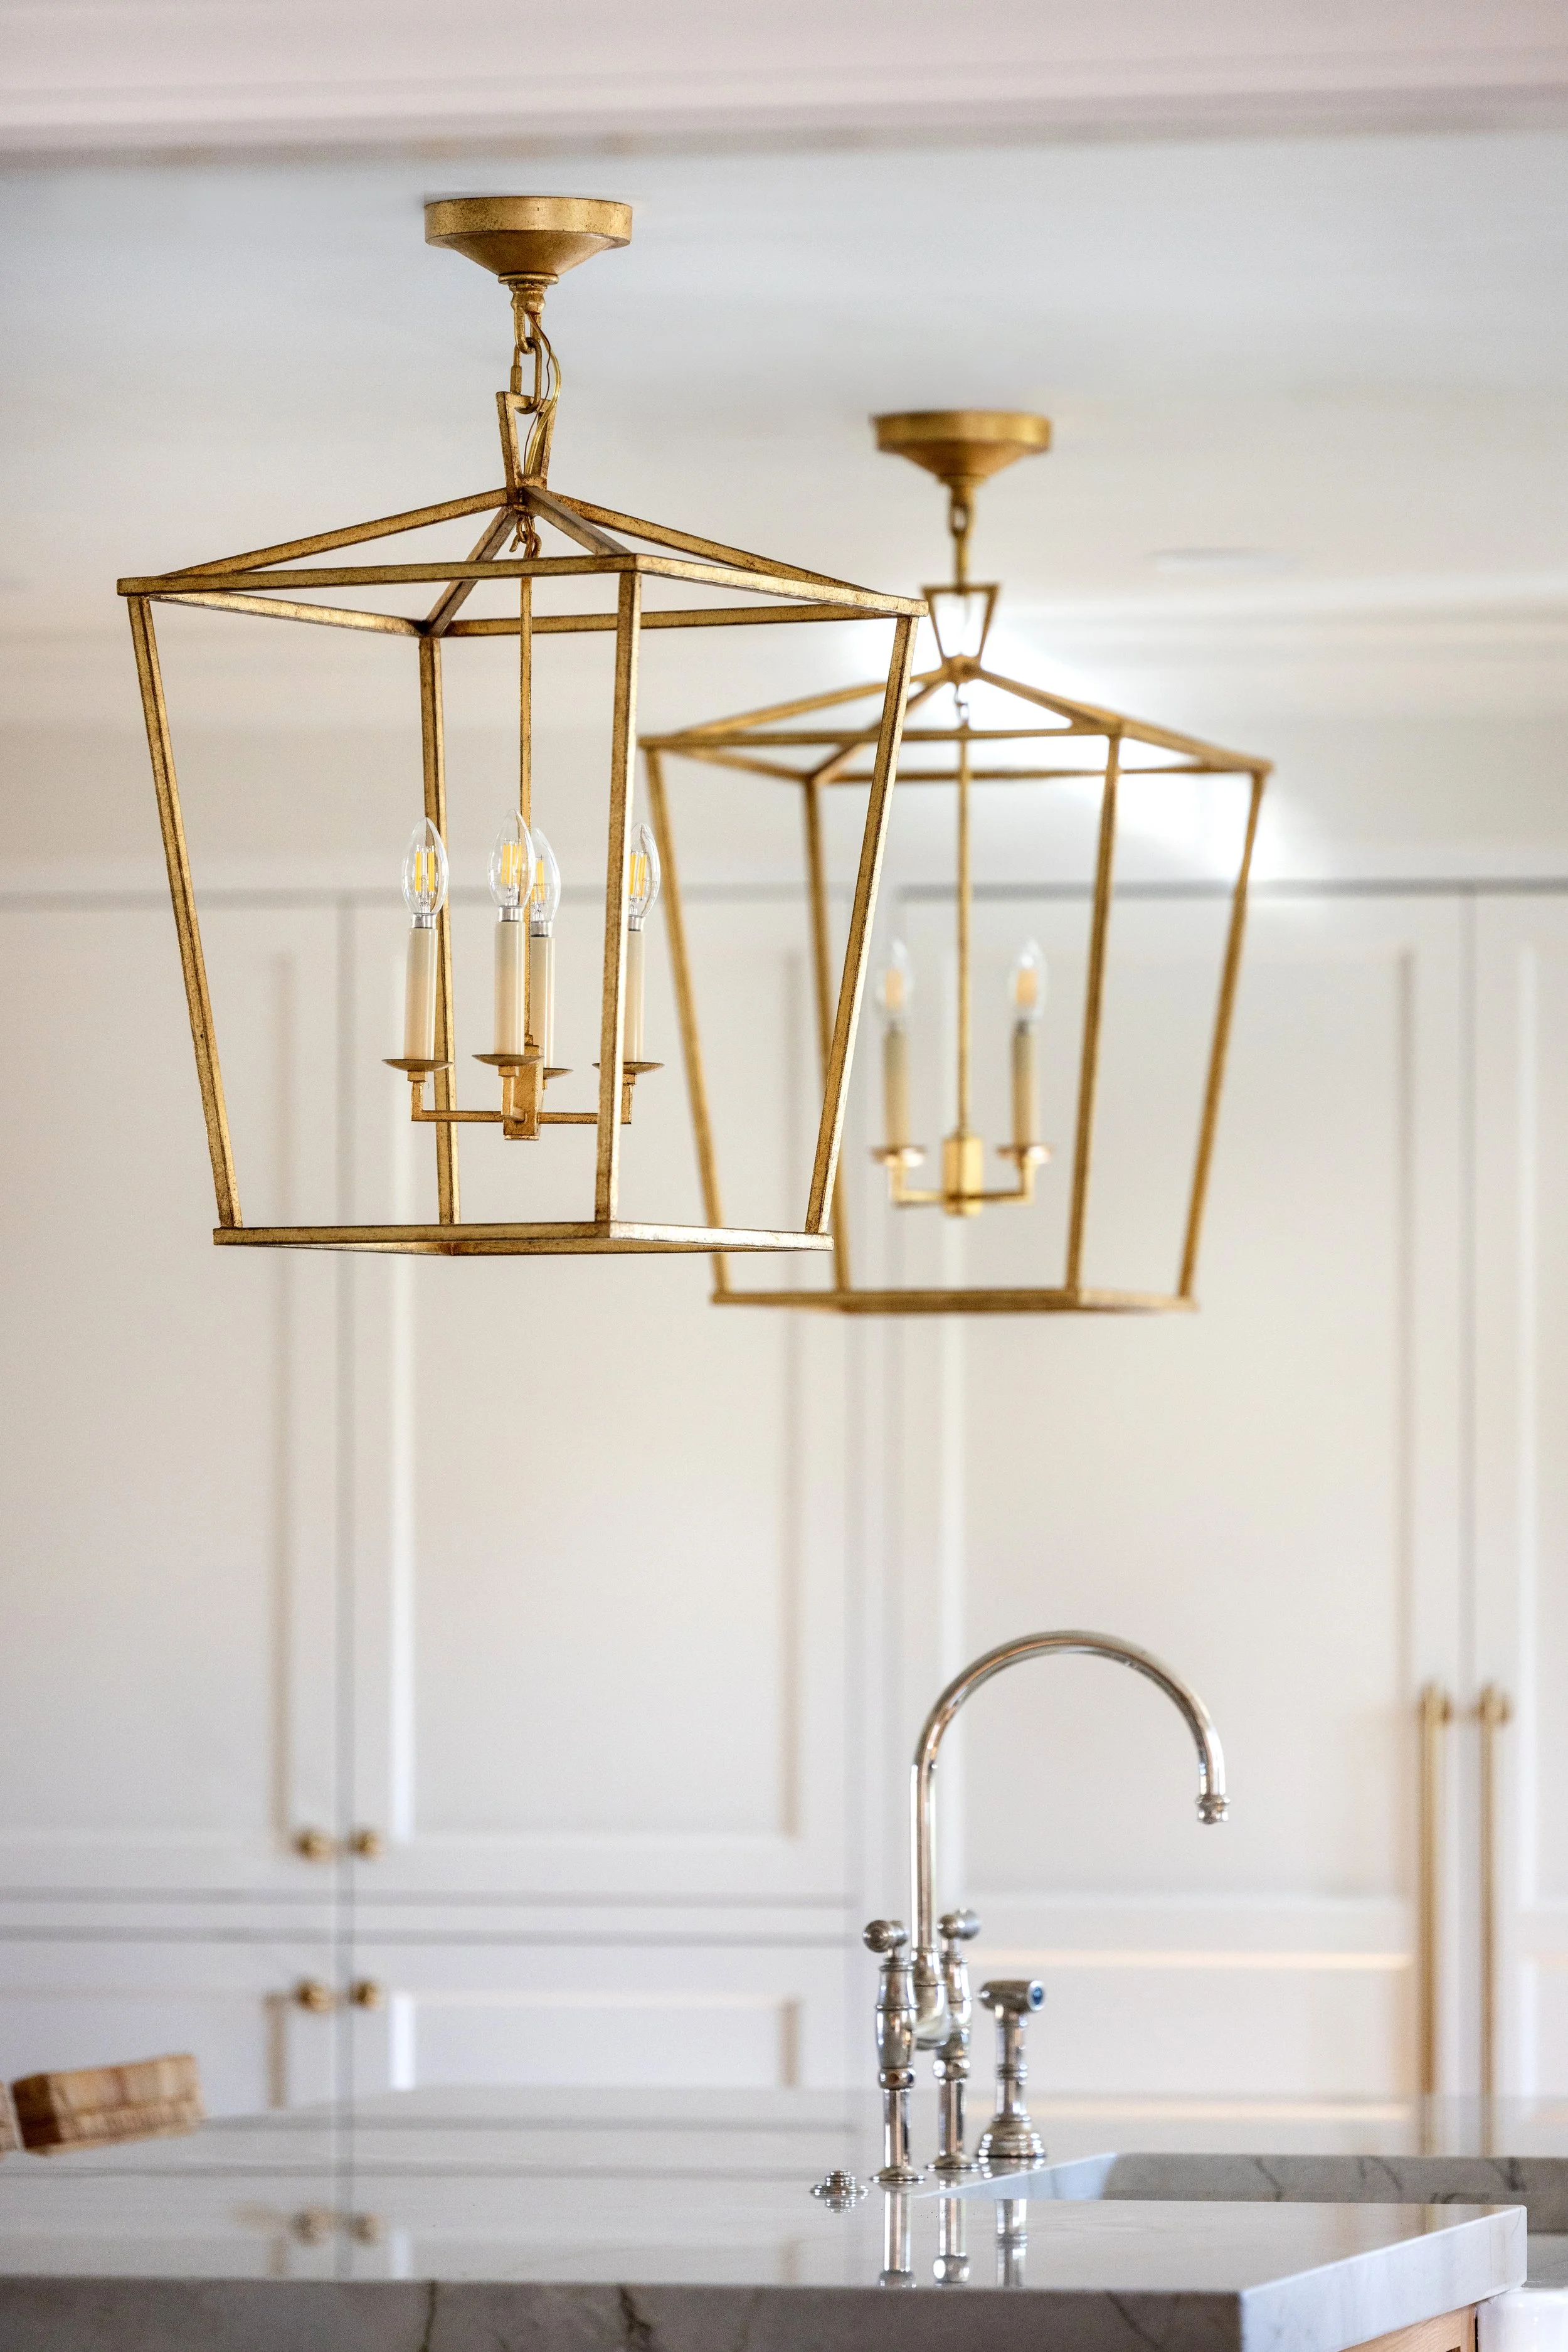
Matching Single-light Pendants by Kichler, Everly Collection in Natural Brass.
Real estate photography by Kim DeLoach.